- Custom Variable Widget
- Priority Matrix
- Heatmap Widget
- Grid Widget
- Weighted mean widget
- Comment List widget
- Widget Filters
- Ranking List Widget
- Distribution Chart
- NPS Widget
- Trend Widget
- Word Cloud Widget
- Cross tab widget
- KPI Comparison Widget
- Bubble chart
- Custom Metric Trend Chart
- Trend Comparison Widget

Layers for journey maps – create, save, and screenshot custom sections of the journey map
The Layers feature allows users to create a custom view of their journey maps by selecting specific lanes and columns. These Layers help users focus on relevant portions of complex journey maps without having to view the entire map each time.
Each Layer can be named, saved, and viewed independently. Layers are optimized for screenshot capture, making it easy to insert journey insights into presentations or reports.
Watch this video to learn how to use Layers in QuestionPro Journey Management to customize journey maps for different perspectives and focus on the insights that matter most to each team.
- Navigate to your desired journey map.
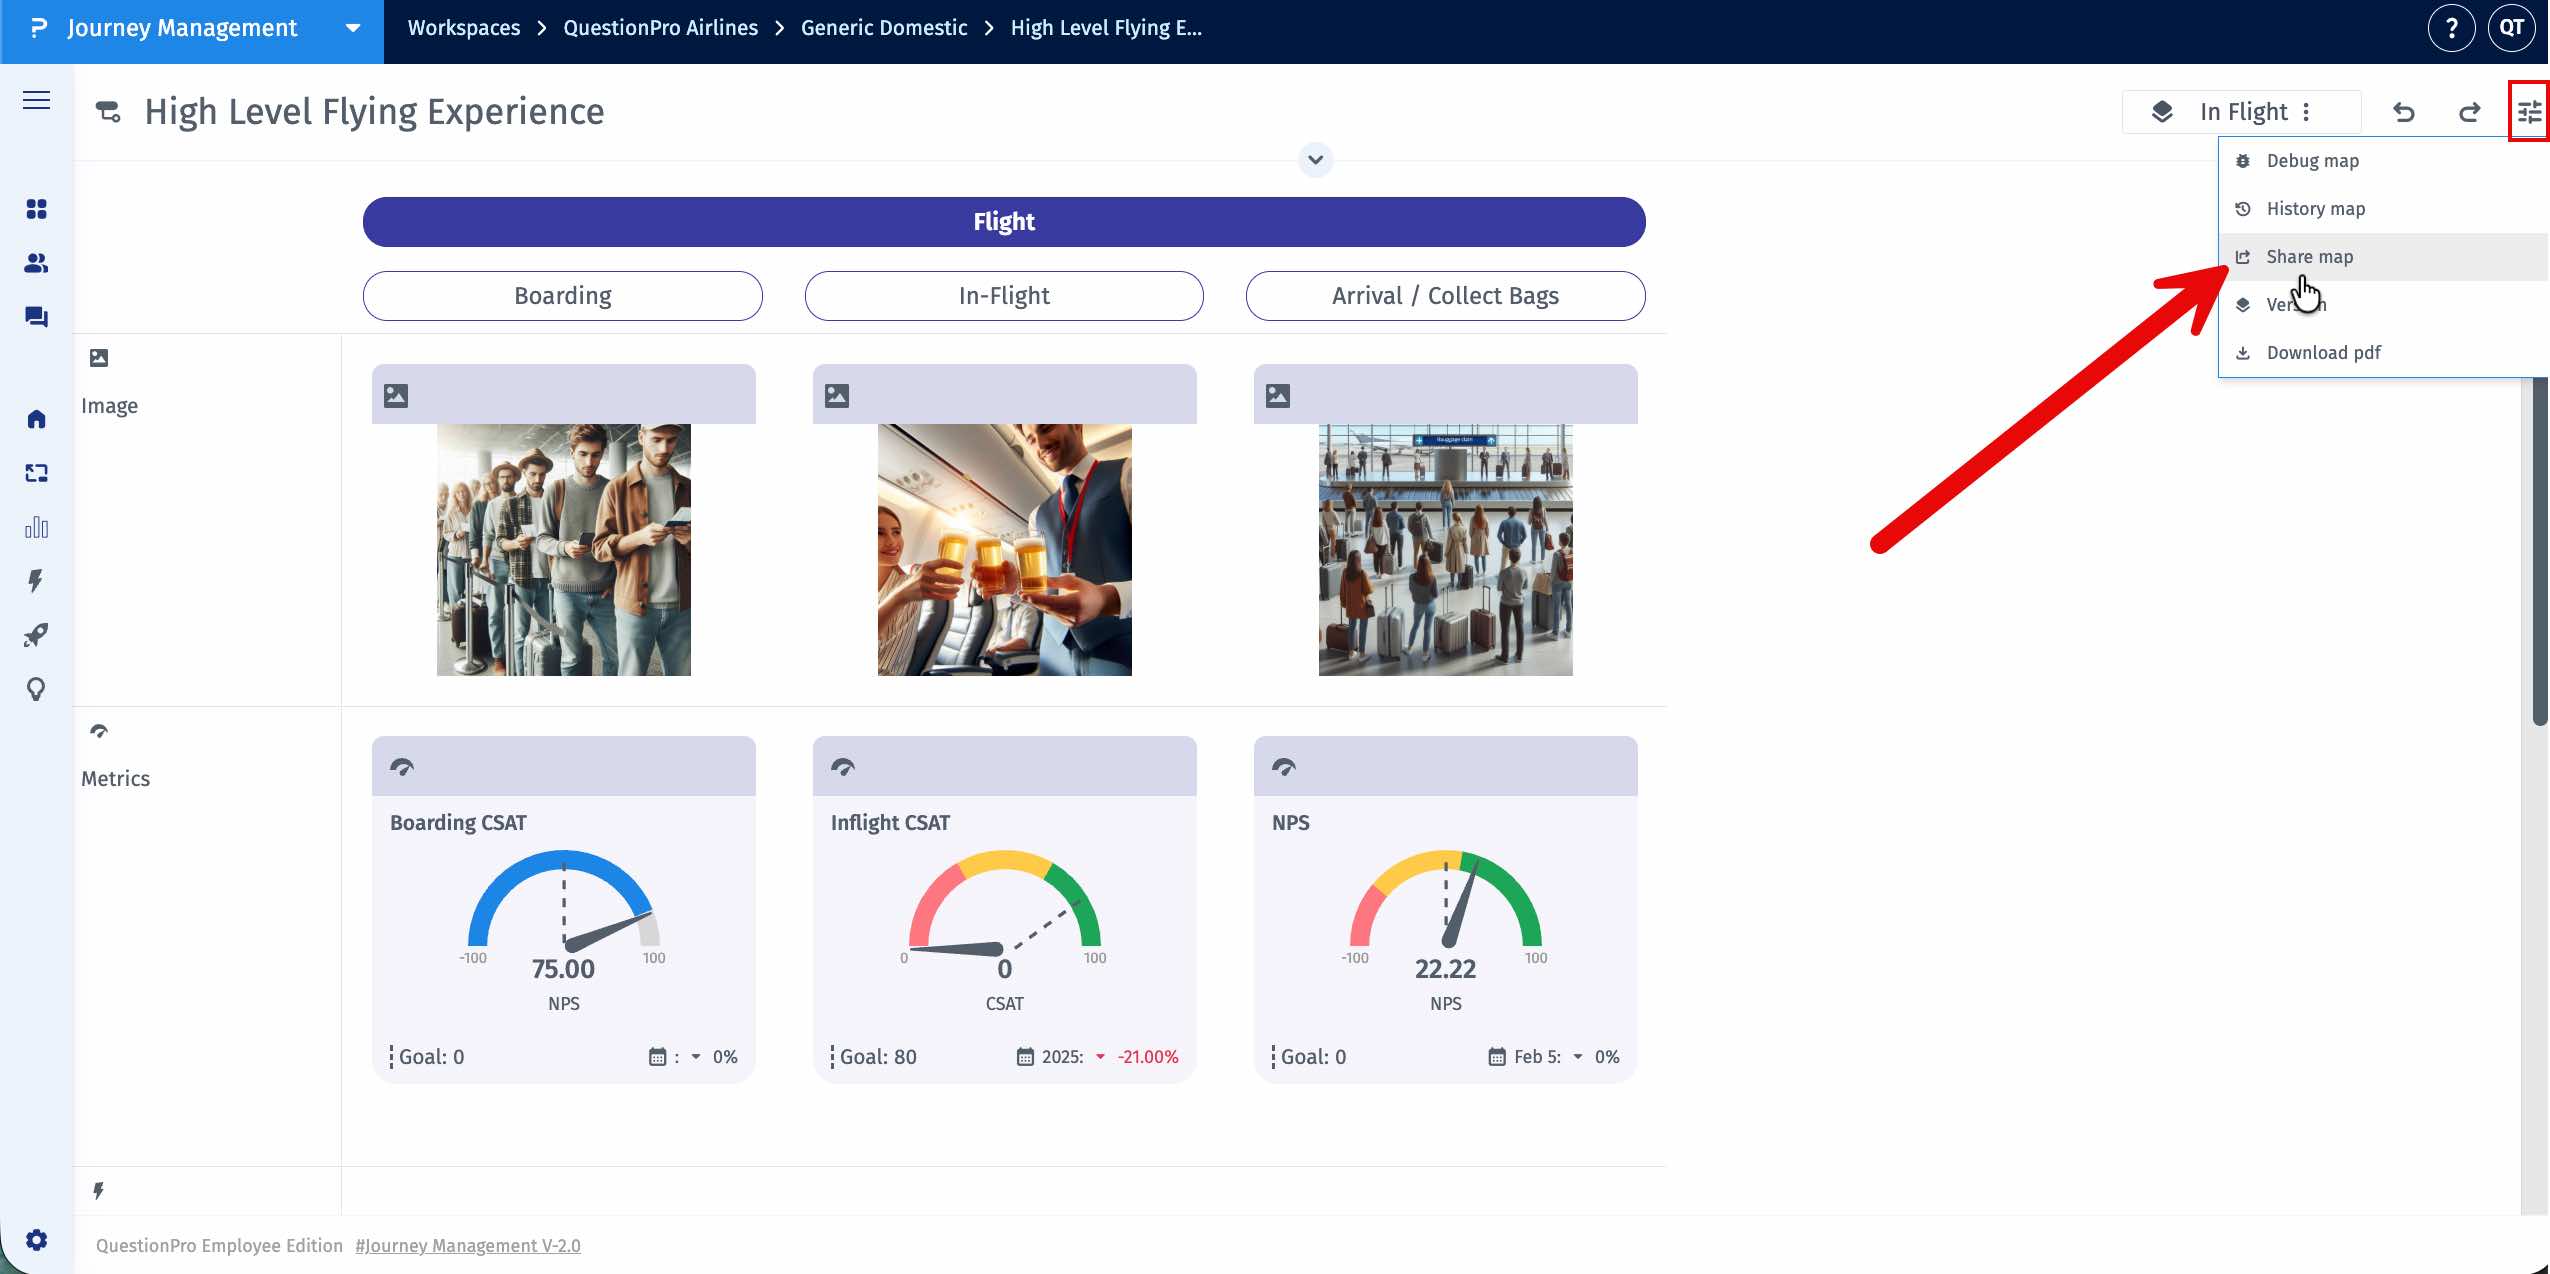
- Click on the Layers button.
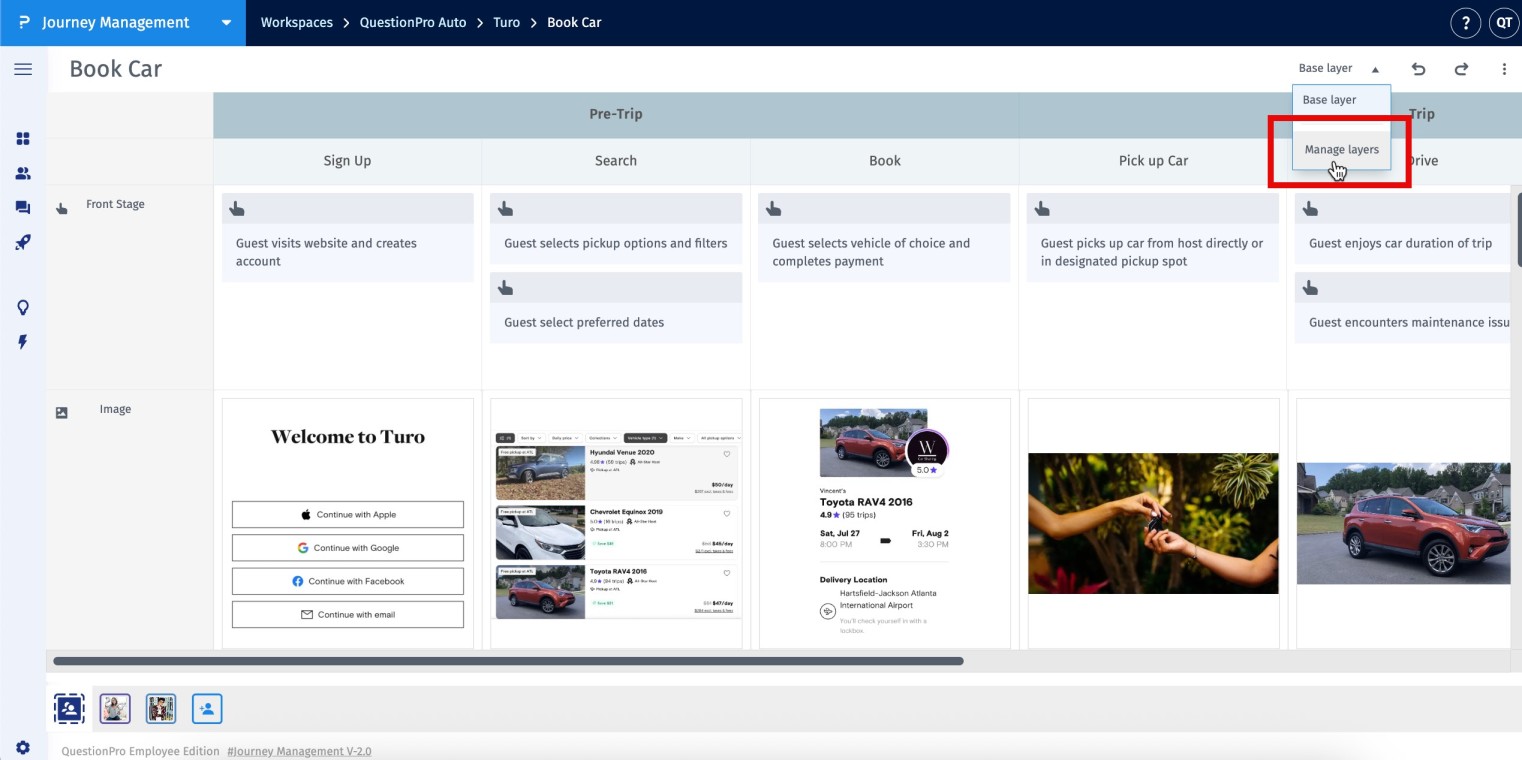
- To create your first Layer, click on Manage Layers.
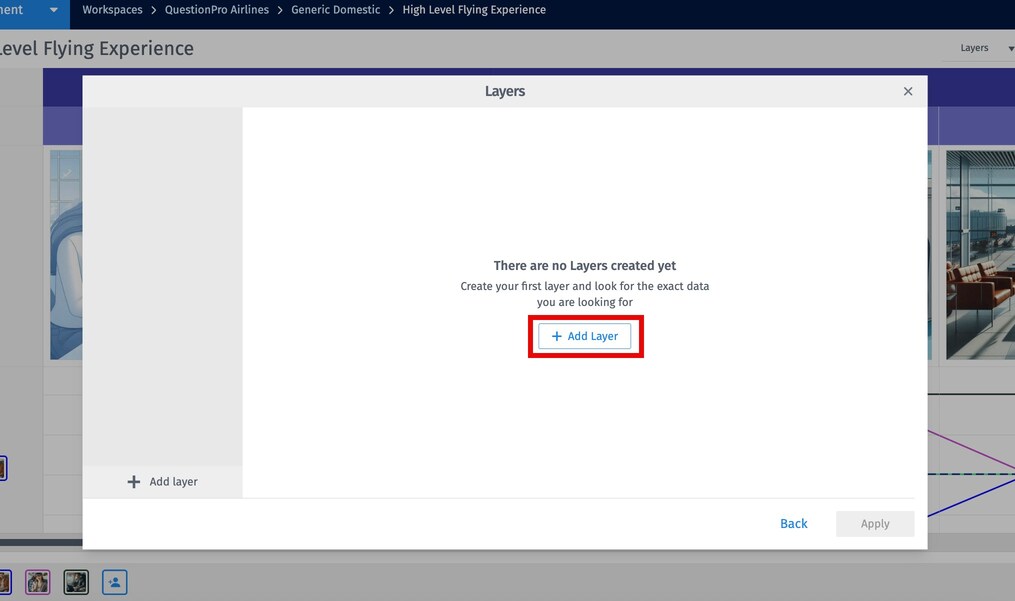
- In the pop-up window, click the Add Layer button.
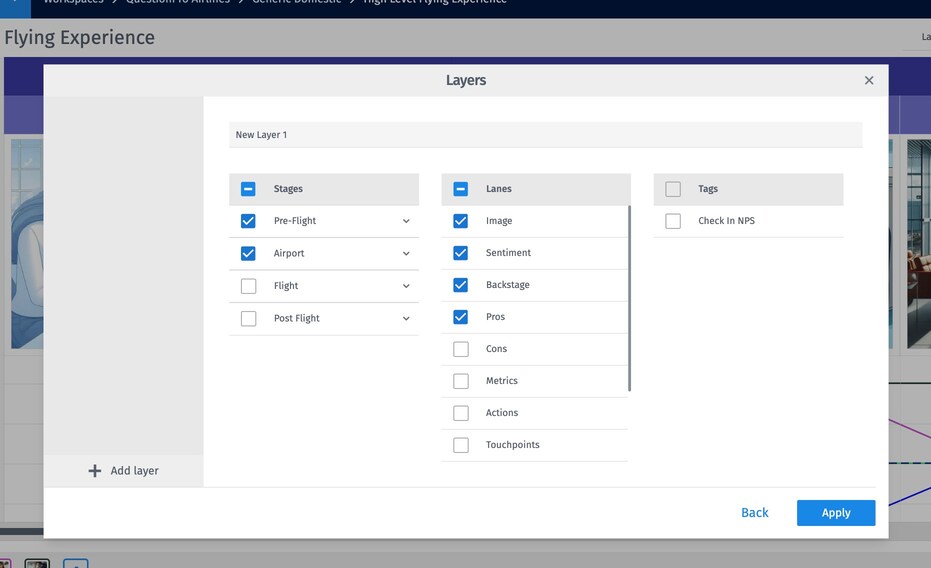
- Choose the lanes and columns you want included in the Layer. You can also add tags to the Layer.
- Enter a name for the Layer and click Apply.
Your new Layer will now appear under the Layers dropdown for quick access and reuse.
- All created Layers are available under the Layers dropdown, and you can switch between any of these Layers.
- Select any saved Layer to load its custom view instantly.
- The active Layer’s name is displayed for easy reference while viewing.
The base Layer is the default view of the entire journey map. It cannot be edited or renamed. All user-created Layers are nested under the base Layer for easy reference and access.
- Saved Layers are always accessible under the selected journey map.
- Click the Manage Layers option and select the Layer you want to edit.
- Make the required updates and click the Apply button.
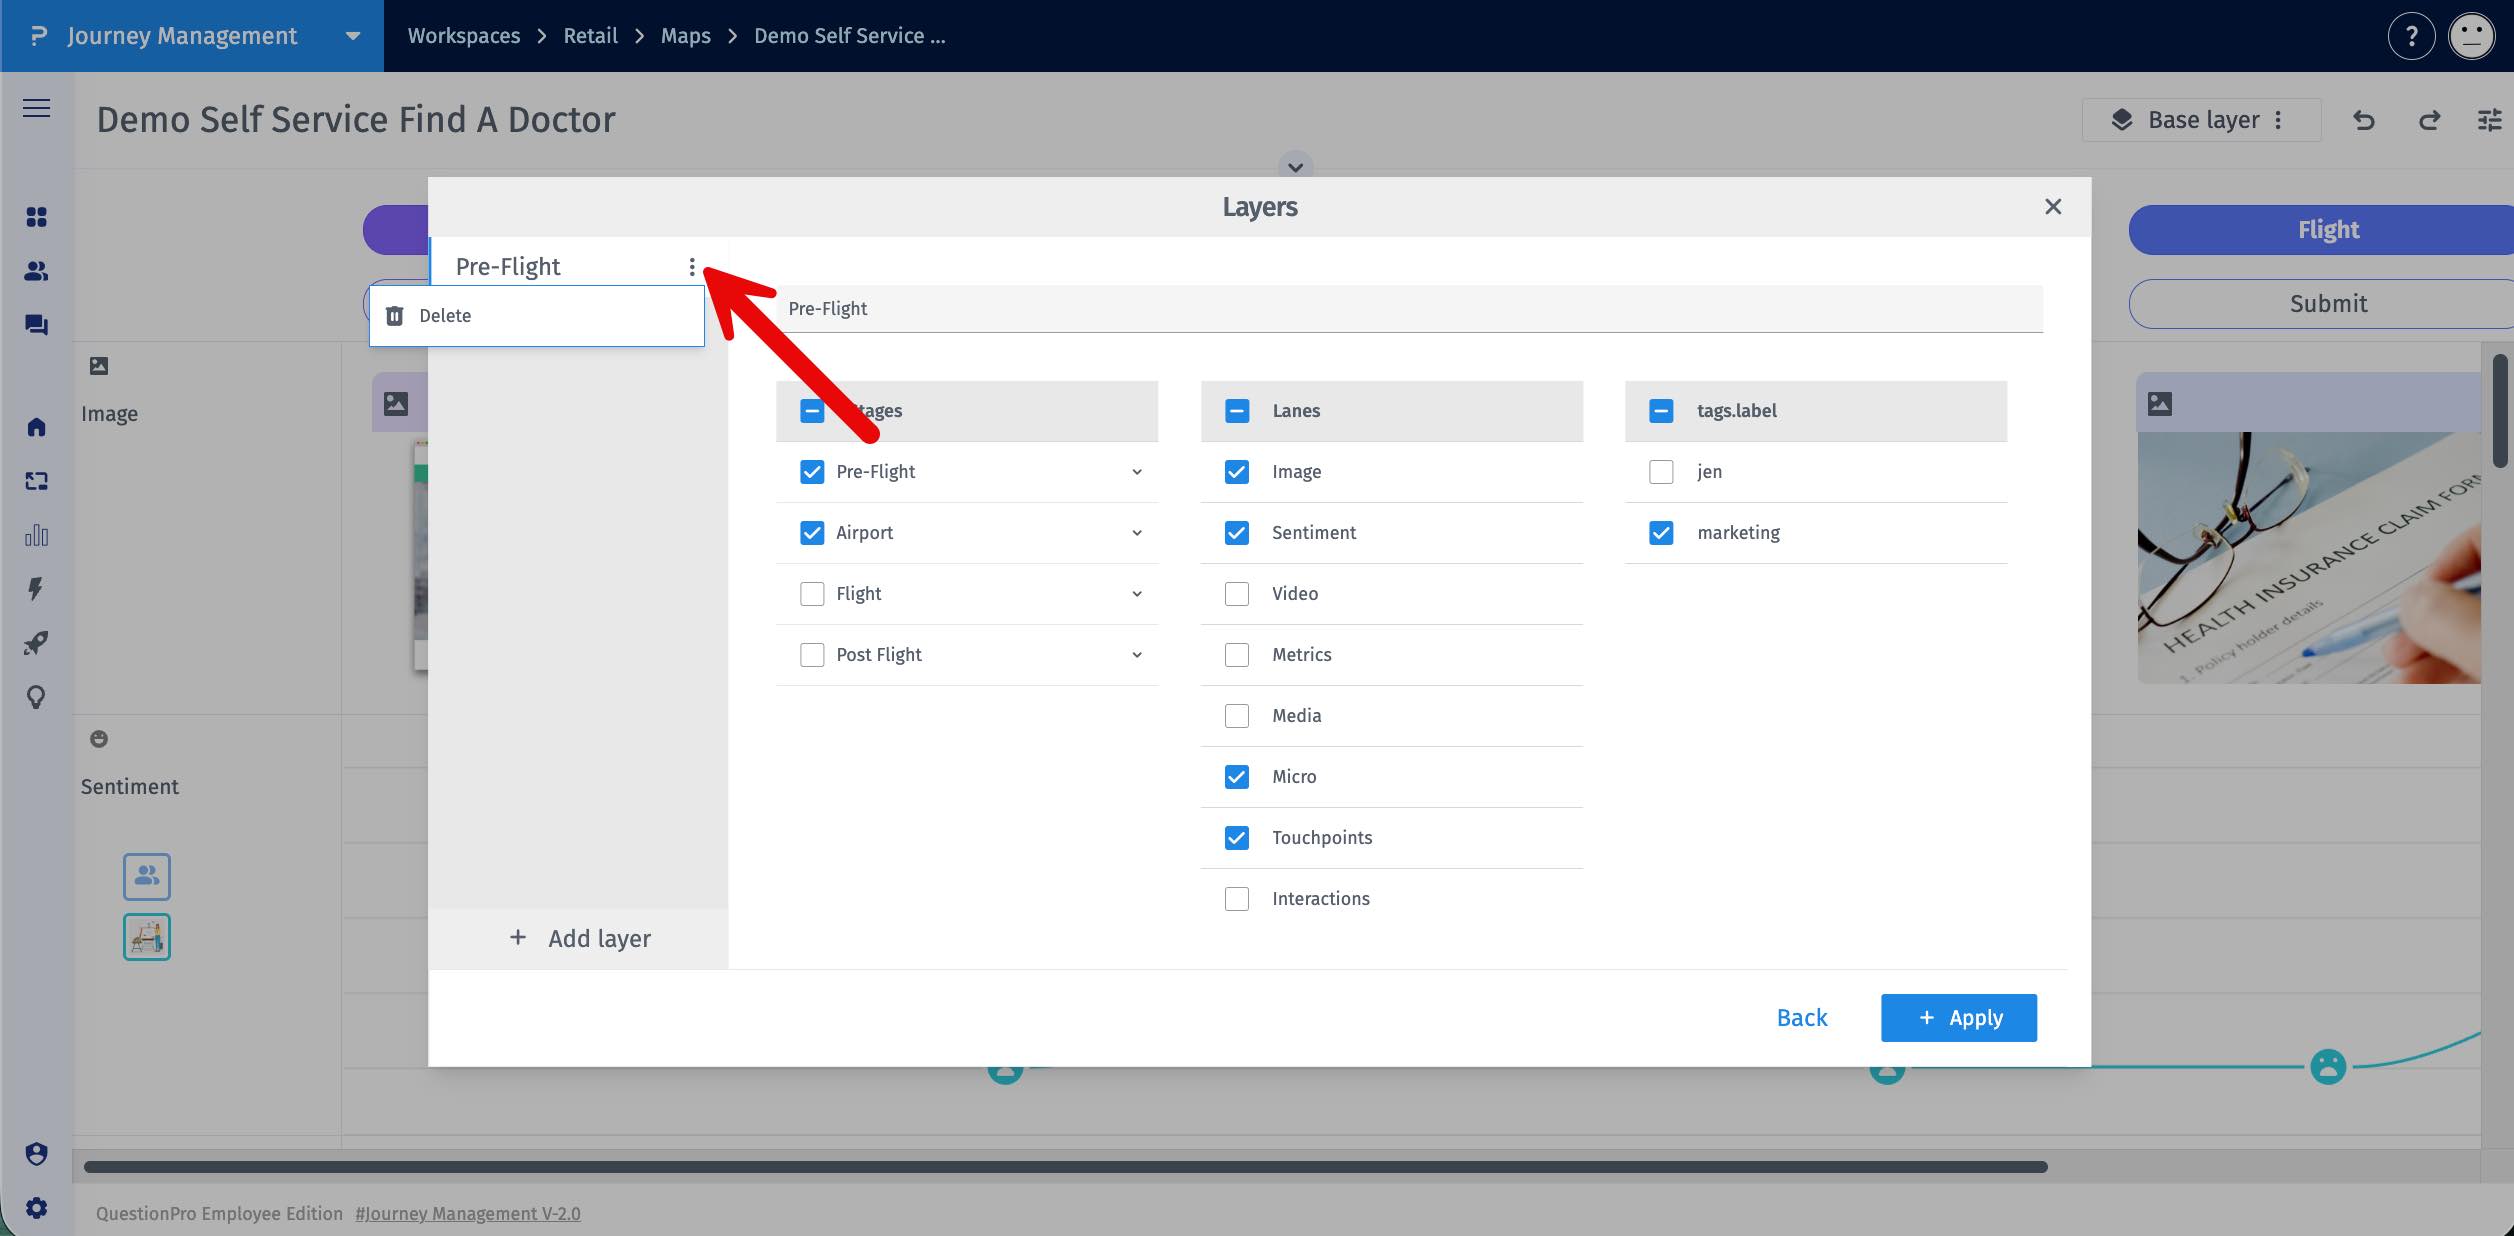
- Open the Layers dropdown and click on Manage Layers.
- Hover over the Layer name you wish to delete.
- Click the three-dot menu (⋮) next to the Layer name.
- Select Delete from the dropdown.
- Simplifies navigation across large and complex journey maps.
- Enables focus on specific stages of the customer journey.
- Improves team collaboration by creating personalized views.
- Makes it easy to screenshot key sections for reports and stakeholder communication.
You can now share your journey map with all applied Layers using a shareable link. Recipients will see the map exactly as you configured it, with all selected Layers visible.
- Apply the desired Layers to your journey map.
- Click the Share button in the map settings.
- The sharable link for the Layer will be copied and you can share it with others. The map will open with all selected Layers visible.